
Benefits of Fiber (Yarn) based Apparel
A fantastic benefit of handmade fiber apparel items is being more sustainable in their care. Yarn just doesn't need to be washed as often as your standard t-shirts, jeans, etc. Especially when looking at wool, dirt and odours aren't absorbed as easily by wool as other fibers do. Often you'll find yourself wearing an undergarment (t-shirt or tank) which will also help your fiber item not needing a wash after wear.
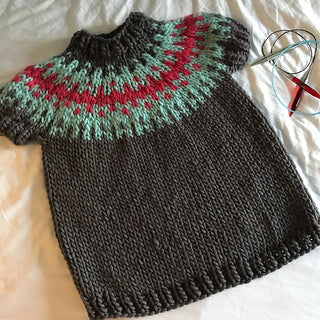
For instance, my own handmade sweaters I get TONS of wear out of before even thinking about washing them. They just don't pick up the smells or dirty feeling like other items. For me, in winter especially, this really cuts down on the amount of my clothing filling up our washer & dryer ~ that means less water & energy usage!
Even things I have made for my kids ~ unless there was a spill (which usually I do try to get the sweater off or get napkins over a dress before meal time), I typically am rescuing these out of the laundry hamper and back to their closets before the hamper moves to the laundry room.
Generally, these items will only need washing 1x per season ~ that's right, wash that sweater with the method below at the start of fall and wear it all fall long (even it winter) before you even need to think about maybe washing it again!
Different Fibers ~ Are they all the Same?
Nope ~ fibers are very different & some may even be okay for machine washers & dryers ~~~~ but DON'T DO IT!
I never recommend machine wash & dry in order to keep the stitches & material lasting a long time & looking great.
That said, if your interested, a bit about different fibers...
Animal Fibers
These would be wool, alpaca, cashmere, & angora ~ they are especially dangerous to machine wash. When exposed to heat, water, & friction together they will do what's called felting. Felting mats all the individual threads together and shrinks it. Worse news ~ felting is not reversible, there is no fixing that! Even silk can get felted if exposing it to heat ~ so all these, let's be sure to skip that machine.
There are some superwash wools, which is wools treated in a special way to be machine washable, but let's just NOT do it.
Oh ~ and be sure to use cold water for these, even when hand washing.
Plant Fibers
Cotton, bamboo, & linen are examples of plant fibers. These fibers have some stretchiness to them. So, while they might be alright to machine wash, the flopping & spinning around could cause some misshapen stretching, so again DON'T do it. :)
Small exception would be face scrubbies or loofahs made out of cotton ~ you do really want those clean, so throw them in the machine washer & dryer, due to their size & not needing to fit you, you'll be fine with those.
Acrylic/Synthetic Fibers
This portion includes acrylic yarns, polyester, & other man made fibers. There are some plastics within these yarns, so while they may be machine washable, in most cases I would hate to put the stitching through it.
In this case though, I will make more exceptions ~ there are some fun or daily use based items made from polyester yarns which are made out of this yarn for the exact purpose of being machine washable!
This would be specifically my crochet water balloons & face scrubbies ~ DO toss them right in the machine for washing & drying, let's just not put settings to the highest extreme heat :)
All Fibers ~ NEVER add Bleach
The How To's of Fiber Apparel Care
So, while you don't need to do it as often, it is a bit more labor intensive to wash fiber items correctly ~ but remember, you rarely have to do it!
I do tend to store up items for a large "wash day" & get my bath tub involved. Although, I'm also making a lot, so there is quite a bit of this going on with a bowl as I wash each item after making it. (Did you catch that??? If you bought it from me, I pre-washed it for you! You get your first season of wear right away!)
I really want you to be able to enjoy your fiber item for YEARS, as I do mine, so let's make sure they are taken care of in the best way!
Now we are through all of the above, let's dive in!
- Fill a container with cold to room temperature water (stay away from hot or boiling temps)
- Container size will depend on the item being washed.
- If it's one item ranging from hat to thin sweater in size, a mixing bowl generally does the trick.
- Thicker sweaters, when only doing one, I tend to take over a bathroom sink for (after giving it a good wipe down to make sure no toothpaste is there! ~ honestly I never use the bathroom where teeth are brushed myself, but it felt like a needed call out if only one bathroom!).
- If you've stored up a number of items & it's handmade wash day, use your bath tub! Similar to the sink above, I would wipe it down first, especially if kids bathe there, make sure dirty feet didn't leave anything behind!
- Add a detergent specifically for fiber items.
- Eucalan & Soak are my go-to's. If you need help finding something let me know, I'd be happy to help!
- Generally directions are 1 teaspoon of the detergent for each gallon of water, but do check the label to confirm.
- Pro-tip: These dedicated wool washes are FABULOUS because they are designed to be left in ~ so we don't have to rinse!!
- They act like leave-in hair conditioner.
- If you are using something different, you will need to add a rinse step in below.
- Gentle Swishing
- We are going to soak next, but before this we do want to make sure the water/detergent combo works into all the garment.
- I like to do gentle squeezes & push the fabric down into the container.
- Swish around gently in the container to get it nice & wet.
- Any areas which might get heavily soiled (like underarms of a sweater), give some extra gentle squeezes to.
- Never wring or scrub, the key is being gentle & not agitating the fibers heavily. Being rough can misshape &/or weaken the fibers.
- Soak ~ aka walk a way for a bit
- 20 minutes of soaking time (again here, confirm with your detergent's label), so you get a break here!
- Pull it out & gently squeeze
- Remove those rings before hand, your about to have very wet hands & I don't like all that water getting stuck below my rings ~ pro-tip :)
- Pull your item out of the container, start at the top & gently squeeze down to remove excess water.
- Again, be sure not to wring here, no twisting, just squeezing.
- If you used a different detergent ~ this would be where you might need to add a rinse step.
- Roll it
- Lay a towel out flat on the floor
- Lay your item flat on top of the towel
- Starting at one end of the towel, gently roll it.
- Pro-tip: take your socks off if you have some on :)
- Press out more water by walking across your rolled out towel. Go ahead & stand on the areas where you know your item is. The towel is soak out even more excess water.
- Block or Lay Flat
- I'm going to keep this pretty simple ~ if your a fellow maker this is where you would go ahead & block as directed.
- ALWAYS lay items as flat as possible to dry.
- Fibers can stretch, which is actually good & bad for us, so laying out flat and gently placing it into it's original shape to dry is best.
- The good part, if the sleeves might have been a little shorter than you liked or sweater body length you now would like a little longer, you can make small adjustments here.
- Laying most of it flat, allow areas you might want to add a little length to, to hang over something. If you have clothespins, you can add some of those to the end for a little weight, just make sure to do this evenly across.
- With the nature of fiber you can sneak a little stretch in this way and help the fibers grow in the way you want.
- Especially true for wool, wool remembers the form it was dried in, so how you lay things out is how they are going to try to stay.
- If it is misshapen or rumpled here, it will end up wrinkly and misshapen when done, so take the minute to lay out flat & nicely in the shape you originally got it in.
- Do be careful not to stretch during this step though, just gently placing (unless your trying to make bigger on purpose!)
- Let it Dry!
- You've done all the work, now is just the hard part of waiting!
- If your super excited to re-wear, maybe add a fan over the area to help speed it along, but DO NOT throw in dryer!
- NOTE for pet owners: please have a safe space for drying. I use my office floor with the door closed. Definitely don't want cat nails stepping on your item after all this work!
- NOTE for parents: see above for pet owners, frankly this is true for you too ~ give your item a safe space to dry :)